By Chris / August 21, 2020
How a Podcast Gets Made - Part 2: Post Production
Welcome back to our series: How a Podcast Gets Made. I realize now, a better title might have been, “How Our Podcast Gets Made” but it’s too late to turn back now! In Part 1, we talked about some of our equipment and working around some initial issues. In Part 2, we’re covering the post production process!
If you’re not sure what “Post Production” means, it’s the process by which sound engineers (and amateurs like me) do our best to fix any issues that were captured during recording and then try not to muck things up too much while trying to make everything sound great together.
Gotta Keep ‘Em Separated

With the Behringer mixer, inputs 1 and 2 are recorded as the left and right sides of a stereo track in Audacity, so the first step was to split the stereo track into two separate mono tracks. Audacity makes this super easy with just two clicks.
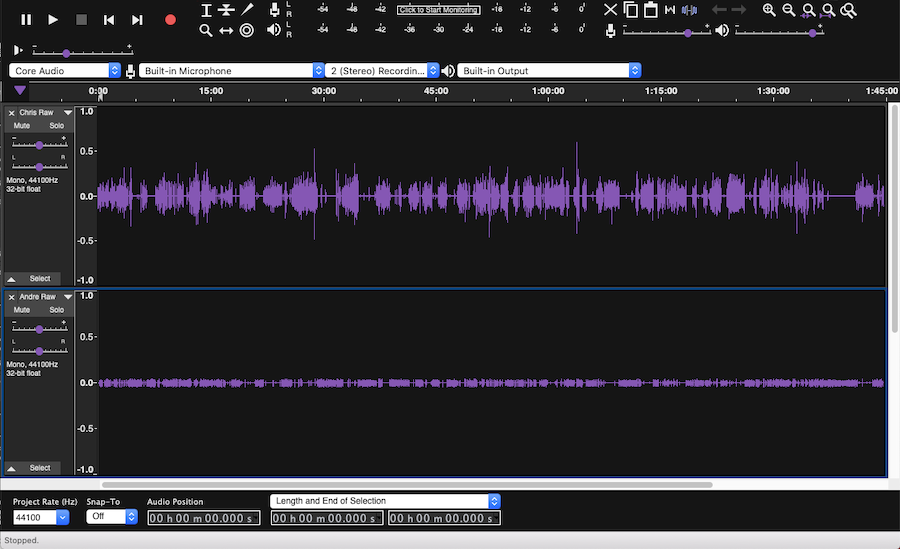
Now that we have the two tracks isolated, we can mute one while we work on the other and then switch it up. Early on, I didn’t spend a ton of time trying to “produce” the audio. I mostly just wanted to make it sound digestible and not grating to the ear. As I continued to work on more episodes, I started trying out different features to see what I could do to improve the overall sound.
Fortunately, my audio has always come through pretty cleanly and without a lot of background noise. I record in the lower level of my house which is on a concrete pad and has brick walls outside and low-pile carpet. I have a couple of small acoustic foam pads mounted on the wall behind and around my microphone to try and eliminate any potential echo getting back to the mic and I use a pop filter, but that’s it.
Andre’s track was the biggest source of frustration at first. Despite our best efforts, the audio funneling out of the computer and back in through the mixer always comes through quiet, so when I boost it to match my audio all of the background noise and interference from the video service gets amplified, too. This is where Noise Reduction comes in handy.
Noise Reduction
Another out-of-the-box feature built in to Audacity, Noise Reduction takes a portion of the audio you select (something that only has the background noise you don’t want) and uses it to then remove that sound from the rest of the track.
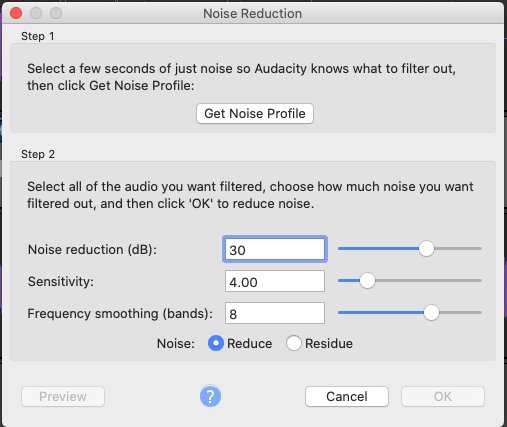
So by selecting a short portion of Andre’s track while I’m flapping my yap, I can filter out just about all of the “bad stuff.”
Squeeze The Juice

This is one that I admittedly spent far too long going without. As I mentioned earlier, I have to boost the audio of each track to get it to a base level (I usually target -4.0db to make sure I don’t have any clipping). With Andre’s track, that’s pretty easy. His audio tends to be very consistent when he’s speaking and therefore easy to boost.
While my audio comes through clearly and cleanly, there tends to be a lot more variation in the volume of my recording. This can cause certain portions of my audio to be perfectly clear while other parts are really hard to hear. I used to spend roughly an hour per episode combing through my audio track looking for peaks and manually reducing them…
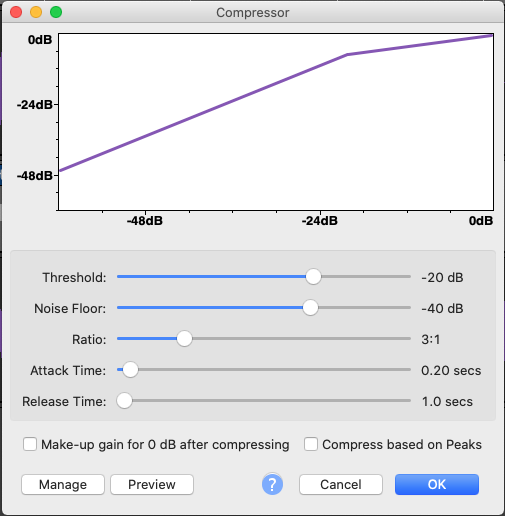
Turns out, audio producers learned long ago that that was a stupid way to do things, so they invented a feature called Compression which does all of that for you. By applying a simple compression filter to my audio track, I can reduce the peaks to match the rest of the audio and then boost everything to be more even. This has been a lifesaver!
This Next Section Features Graphic Content
Ok, so it’s not really graphic content, but rather, content about Graphic Equalization(EQ). Graphic EQ is a fancy way of letting you reduce or boost the volume of specific EQ bands of the audio track. When recording lower, more booming voices, you will typically want to use a low roll-off so it doesn’t make the track sound muddy.
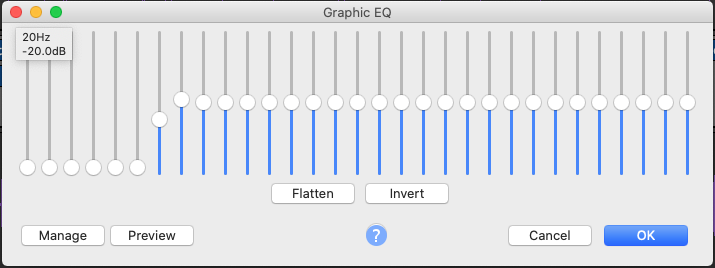
Likewise, if you are recording a high pitched sound, you’ll want to drop the top end to prevent everything from sounding airy. For our purposes, I use a simple Voice Low Roll-Off EQ for both tracks.
Normalization
The last step I usually take is to boost the peaks of the tracks back up to -4.0db before moving on. Since we’re working with mono tracks here, Audacity actually has two features that will accomplish the same thing, Amplify and Normalize. While you can use either here, I switched to Normalize when i started using Macros because it’s only setting it the target level whereas Amplify applies a specific level of +/- amplification, regardless or the resulting level.
Macros
You probably noticed I mentioned Macros in the last section without really expanding on them. Macros (along with Compression) are something I only know about because of Andre’s research efforts. The cool thing about Macros is that they allow you to chain together several processes in a specific order. I use macros primarily to handle the audio processing for each track, since I use the same process each time.
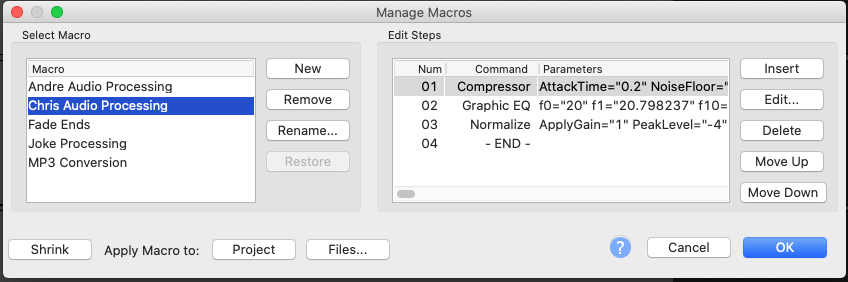
Once the tracks are split, I duplicate them to preserve a copy of the raw audio, just in case! Then I select my track and run the “Chris Audio Processing” Macro, which compresses the audio, applies a Graphic EQ, and then normalizes the track to -4.0db.
Next, I select Andre’s track and run the “Andre Audio Processing” Macro, which does the same thing as above, but with different settings for the compression and EQ. Then I go back and manually do the Noise Reduction processes on Andre’s track to clean that up. I’m now looking at automating the entire processes here of splitting the tracks, renaming them, selecting the right one, running the right macro, and then moving on to the next.
Why spend time doing this, you ask? Because this isn’t my full-time job! I have other stuff I need to be doing and editing podcast episodes usually occurs in rare moments of free time. So being able to open up an episode and have everything done with just a couple of clicks while I’m off prepping dinner or sending a client email is a huge benefit.
And that’s it for Part 2 of this series! Next, we’ll talk about our recent attempts to upgrade our equipment and some things to look out for!
